Recipe · Sweet Breads
Fresh Milled Chocolate Babka
By: Eleen Beisner
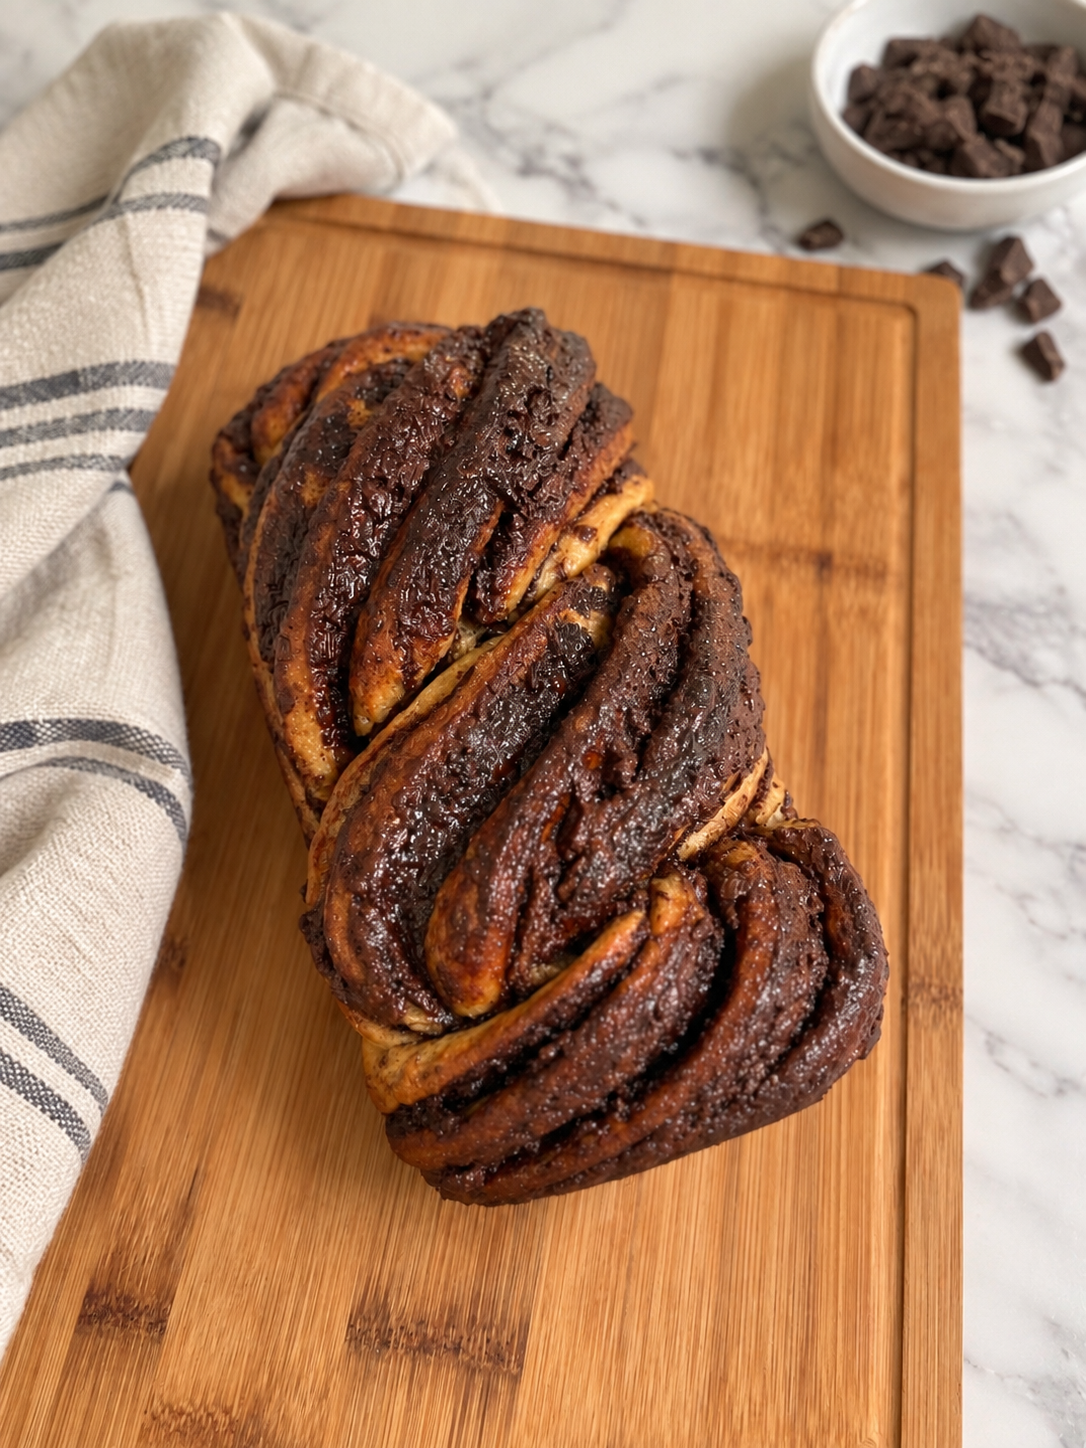
Soft, buttery layers of fresh milled dough are swirled with chocolate and finished with a simple sugar syrup in this Fresh Milled Chocolate Babka. Hard white wheat gives the dough strength for shaping, while Kamut adds a naturally buttery flavor that pairs beautifully with the rich chocolate filling. The dough is mixed the night before and refrigerated overnight, making this an impressive loaf that is surprisingly manageable when broken into simple steps.
Prep time: 45 minutes · Bake time: 45–50 minutes · Yields: 1 loaf
Ingredients
For the Dough
- 300 g freshly milled hard white wheat flour (about 2½ cups)
- 60 g freshly milled Kamut flour (about ½ cup)
- 12 g vital wheat gluten (about 1½ tablespoons), optional
- 135 g warm water (about ½ cup + 1 tablespoon)
- 113 g unsalted butter, melted and slightly cooled (½ cup / 8 tablespoons)
- 50 g granulated sugar (¼ cup)
- 3 g instant yeast (1 teaspoon)
- 7 g fine salt (1⅛ teaspoons)
- 100 g egg (2 large eggs)
- 18 g egg yolk (1 large egg yolk)
For the Chocolate Filling
- 150 g chocolate-hazelnut spread, such as Nutella (½ cup)
- 85 g bittersweet chocolate, finely chopped (3 oz / about ½ cup)
For the Sugar Syrup
- 60 g water (¼ cup)
- 75 g granulated sugar (6 tablespoons)
- Less than 1 g fine salt (generous pinch)
Instructions
Day One: Mill the Flour
Mill the hard white wheat and Kamut.
If using the optional vital wheat gluten, add it to the freshly milled flour and whisk until evenly combined.
Mix the Wet Ingredients
In a large bowl, whisk together the warm water, melted and slightly cooled butter, sugar, salt, and instant yeast.
Add the eggs and egg yolk and whisk again until well combined.
Add the Fresh Milled Flour
Add the flour mixture to the wet ingredients. Stir until all of the flour has been absorbed and no dry patches remain.
The dough will be soft, sticky, and somewhat rough at this stage. This is normal. Do not add additional flour or knead the dough yet.
If you are making the dough without vital wheat gluten, it may feel a little softer and more delicate. That is okay. The hard white wheat will still provide the structure the dough needs.
Begin the First Rise
Cover the bowl and let the dough rest at room temperature for about 90 minutes.
The dough does not need to double in size. You are simply giving the yeast a head start before the long cold rest.
Refrigerate Overnight
Keep the dough covered and transfer it to the refrigerator for 8–16 hours.
The long cold rest gives the fresh milled flour plenty of time to absorb the liquid while also firming the dough so it is easier to work with the following day.
Day Two: Prepare the Pan and Work Surface
Generously butter a 9 × 5-inch loaf pan.
Lightly oil your work surface and rolling pin to help prevent the dough from sticking. Use only a thin coating of oil. Too much can make the dough difficult to handle.
Briefly Knead the Cold Dough
Turn the cold dough onto the lightly oiled work surface. Knead for about 30 seconds, just until the dough becomes smoother and easier to work with.
This short knead is important. It brings the rested dough together and creates a smoother, more workable dough for rolling.
If you did not use vital wheat gluten, handle the dough gently during this step.
Roll the Dough
Using the lightly oiled rolling pin, roll the dough into approximately a 14 × 14-inch square, about ⅛-inch thick.
If the dough begins sticking, add another very light coating of oil to the work surface or rolling pin rather than adding additional flour.
If the dough begins to resist, spring back, or tear, let it rest for 5–10 minutes before continuing.
Add the Chocolate Filling
Spread the chocolate-hazelnut spread evenly over the dough, leaving about a ½-inch border around the edges.
Sprinkle the chopped bittersweet chocolate evenly over the top.
Roll Into a Log
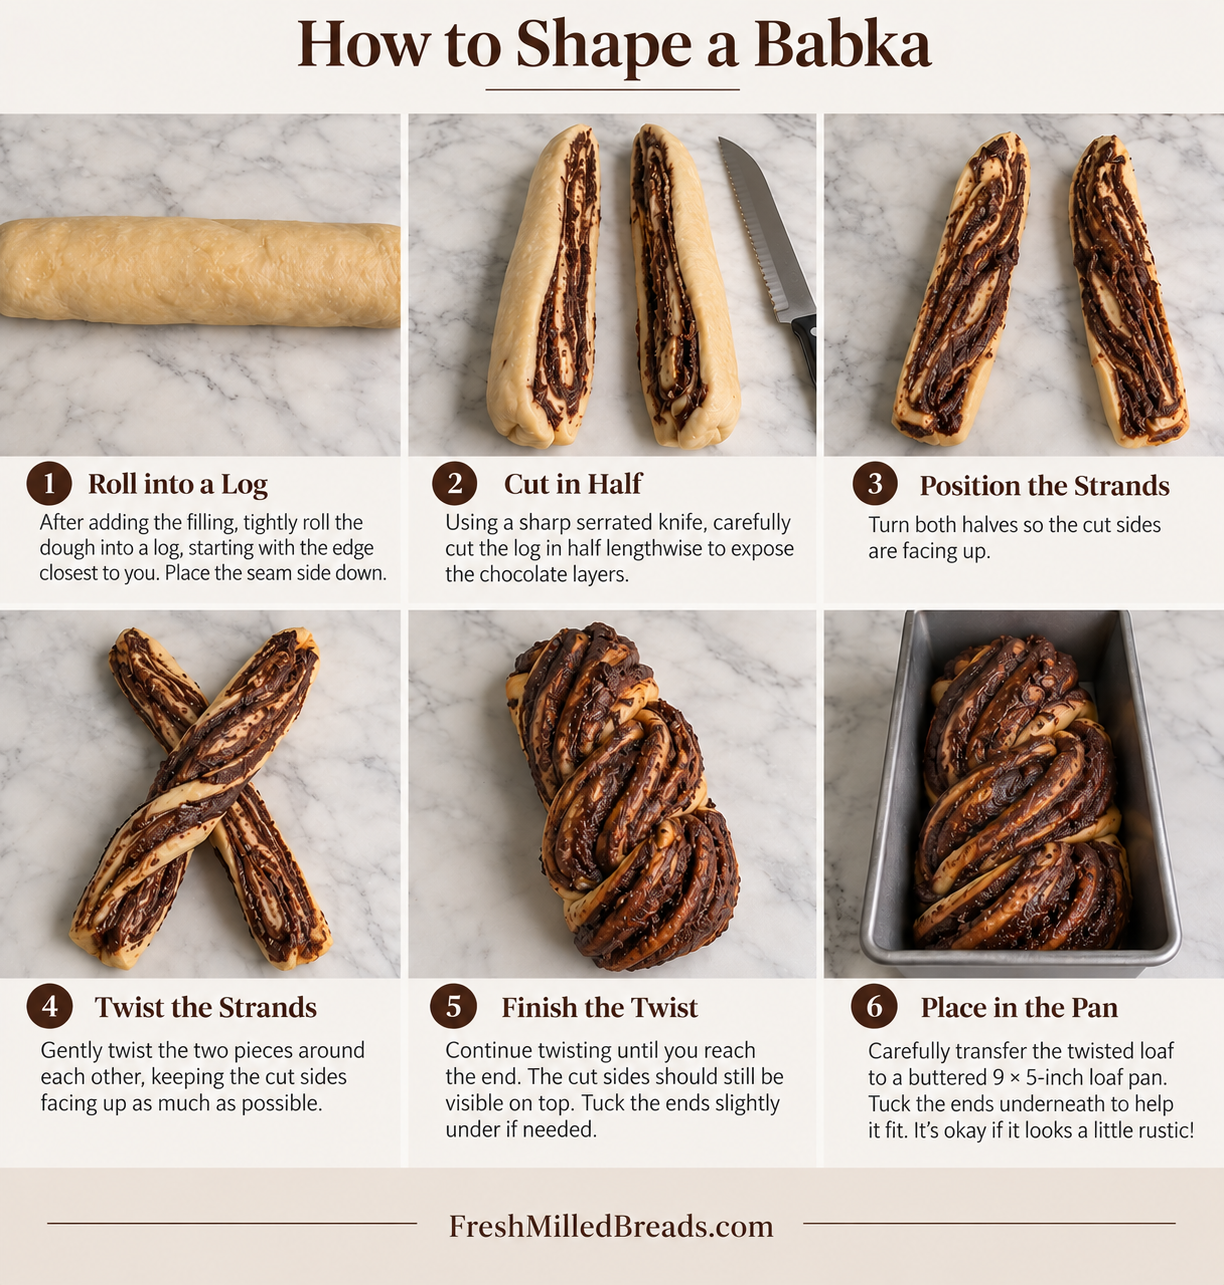
Starting with the edge closest to you, tightly roll the dough into a log.
Place the log seam-side down on your work surface.
Cut and Twist the Babka
Using a sharp knife, carefully cut the log in half lengthwise to expose the chocolate layers.
Turn both pieces so the cut sides face upward. Twist the two pieces around each other, keeping the exposed chocolate layers facing upward as much as possible.
Carefully transfer the twisted loaf to the prepared pan. Tuck the ends underneath if needed to help it fit.
Don’t worry if this step gets a little messy. Babka usually does.
Let the Babka Rise
Cover the loaf loosely and let it rise at room temperature for 60–90 minutes.
The babka is ready to bake when the dough looks noticeably puffier and feels lighter. It does not need to double in size.
Toward the end of the rise, preheat the oven to 350°F.
Bake
Bake on the center rack at 350°F for 45–50 minutes.
The babka is finished when the bread portion of the center reaches approximately 190–200°F. When checking the temperature, place the thermometer into the dough rather than a pocket of melted chocolate.
Make the Sugar Syrup
While the babka is baking, combine the water, sugar, and salt in a small saucepan.
Bring to a gentle boil, stirring until the sugar has completely dissolved. Remove from the heat and set aside.
Brush with Sugar Syrup
As soon as the babka comes out of the oven, generously brush the warm sugar syrup over the entire top of the loaf.
Continue brushing until most or all of the syrup has been absorbed. The syrup gives the babka its glossy finish while helping it stay soft and moist.
Cool
Let the babka cool in the pan for about 15 minutes, then carefully remove it and transfer it to a cooling rack.
Allow it to cool completely before slicing for the cleanest chocolate swirls.
Baker's Notes
Do I Need Vital Wheat Gluten?
No. Vital wheat gluten is optional in this recipe.
The hard white wheat provides most of the strength needed for the dough, so you can make the babka without adding vital wheat gluten. The dough may simply be a little softer and more delicate during rolling and shaping.
Adding vital wheat gluten gives the dough a little extra strength and can make it easier to roll thin, fill, cut, and twist without tearing. It can be especially helpful if you are new to working with fresh milled enriched doughs.
Why Use Kamut?
Kamut has a naturally buttery, slightly sweet flavor that is especially good in enriched breads like babka. Paired with hard white wheat, it adds tenderness and flavor without making the dough too delicate to roll and twist.
The hard white wheat provides most of the structure, while the smaller amount of Kamut gives this loaf its soft texture and rich flavor.
Storing & Freezing
Storing
Store the cooled babka tightly covered at room temperature for up to 3 days. Keep the cut side well wrapped to help prevent it from drying out.
Freezing
Once completely cool, wrap the whole loaf or individual slices tightly and place in a freezer-safe container or bag. Freeze for up to 3 months.
Thaw at room temperature while still wrapped. Individual slices can also be gently warmed before serving.