Recipe · Rolls & More
Fresh Milled Brioche Hamburger Buns
By: Eleen Beisner
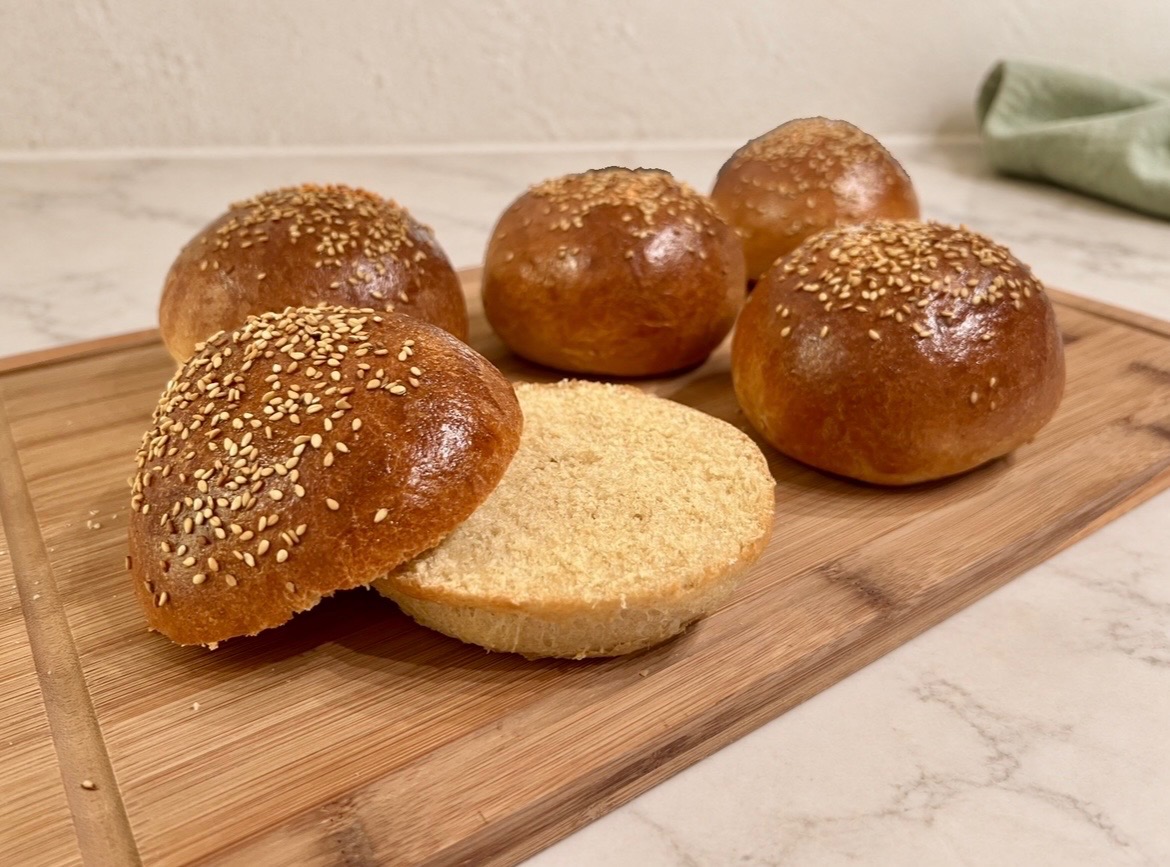
Tall, soft, buttery hamburger buns made with fresh milled hard white wheat and Kamut. An overnight cold ferment develops flavor and makes the dough easier to shape into tall, rounded buns.
Prep time: 3 hours · Overnight ferment: 8–16 hours (overnight) · Bake time: 18–24 minutes · Yields: 6 large hamburger buns
Ingredients
Dough
- 260 g fresh milled hard white wheat flour — approximately 2¼ cups
- 60 g fresh milled Kamut flour — approximately ½ cup
- 12 g vital wheat gluten — approximately 1⅓ tablespoons
- 12 g nonfat dry milk powder — approximately 1 tablespoon plus 2 teaspoons, depending on brand
- 145 g whole milk, cool — approximately ½ cup plus 1½ tablespoons
- 100 g whole eggs, weighed without shells — approximately 2 large eggs
- 18 g egg yolk — approximately 1 large yolk
- 30 g granulated sugar — approximately 2 tablespoons plus 1 teaspoon
- 6.5 g fine salt — approximately 1⅛ teaspoons
- 4 g instant yeast — approximately 1¼ teaspoons
- 70 g unsalted butter, cool and pliable, cut into small pieces — approximately 5 tablespoons
Egg Wash and Topping
- 50 g whole egg, without shell — approximately 1 large egg
- 5 g water — 1 teaspoon
- 9 g sesame seeds, optional — approximately 1 tablespoon
Instructions
Day 1 — Hydrate the Flour
In the bowl of a stand mixer, combine both flours, vital wheat gluten, and milk powder.
Whisk together the milk, whole eggs, and extra egg yolk. Add to the flour mixture and mix until no dry flour remains. Cover and rest for 25–30 minutes. Leave out the sugar, salt, yeast, and butter during this rest.
Day 1 — Begin Developing the Dough
Add the sugar, salt, and instant yeast. Using a dough hook, mix until the ingredients are evenly incorporated and the dough begins to hold together and stretch.
The dough may feel quite tight and stiff at this stage. It will soften considerably as the butter is incorporated, so do not add extra milk based on its initial firmness.
Day 1 — Gradually Incorporate the Butter
With the mixer running, add the butter one small piece at a time. Allow each piece to fully incorporate before adding the next; this may take a couple of minutes per piece. The dough may temporarily smear around the bowl before coming back together.
Allow approximately 8–25 minutes total for kneading, depending on your mixer. Watch the dough rather than following an exact time—it should become stretchy, elastic, and smooth.
This total includes the mixing time before and during butter incorporation—it is not an additional 8–25 minutes after the butter has been added. Once all the butter is fully incorporated, check the dough. If it is smooth, elastic, and passes the windowpane test, kneading is finished. Continue mixing only if it needs further development.
To check the windowpane, gently stretch a small piece of dough between your fingers. It should form a thin membrane that lets light through before tearing. Small holes around bran flecks are normal.
The finished dough should be soft and slightly tacky but hold a rounded mound. It may still cling to the bottom of the bowl. If it becomes warm, greasy, or increasingly loose, cover and refrigerate the bowl for 15–20 minutes before continuing.
Day 1 — Begin the First Rise
Transfer the dough to a lightly greased container with room for expansion. Cover and let rest at room temperature for approximately 30–60 minutes, until it starts to puff and is roughly 20–30% larger.
Follow the dough’s appearance rather than the clock. It should not double before refrigeration.
Day 1 — Refrigerate Overnight
Cover tightly and refrigerate for 8–16 hours. A wide, shallow container helps the dough cool more quickly. The dough will continue rising as it chills.
Day 2 — Divide and Shape
Line a baking sheet with parchment paper. Divide the cold dough into 6 equal portions, approximately 120 g each. If the dough is too firm to shape without tearing, let it rest for 10–15 minutes.
Lightly oil your hands and work surface. Bring the edges of each portion toward the center and pinch together. Turn seam-side down, cup your hand around the dough, and draw it toward you in short movements to tighten the surface. Use minimal oil so the dough has enough traction to form a rounded ball.
Arrange the buns on the baking sheet with approximately 3 inches between them. Leave them rounded rather than pressing them flat.
Day 2 — Allow the Final Rise
Cover loosely with lightly greased plastic wrap. Let rise and keep away from direct heat, until noticeably expanded, rounded, and soft.
Allow approximately 2–4 hours from chilled dough, depending on room temperature. A gentle press on the side should spring back slowly and leave a slight indentation. If it springs back quickly, allow more proofing time.
Day 2 — Brush and Bake
Preheat the oven to 375°F with a rack in the center.
Beat the egg-wash egg with the water. Gently brush a thin layer over the buns and sprinkle with sesame seeds, if using.
Bake for 18–24 minutes, until deeply golden and the centers register approximately 190–195°F. Begin checking at 18 minutes. Tent loosely with foil if the tops brown before the centers finish baking.
Day 2 — Cool and Store
Transfer the buns to a wire rack and cool completely before slicing.
Store cooled buns in an airtight container at room temperature for up to 2 days, or freeze for longer storage.
Baker's Notes
Wait until the butter is incorporated before adjusting the milk. If the dough remains unusually stiff after all the butter is incorporated, add milk 5 g at a time—approximately 1 teaspoon—up to 15 g total, allowing each addition to absorb. Do not add milk if the dough is already soft and pliable.
Keep the butter cool and pliable. It should yield when pressed but should not be melted or greasy.
Use the dough’s appearance to judge each rise. Room temperature, refrigerator temperature, and altitude affect timing. At high altitude, begin checking earlier.
Storing and Freezing
Storing
Cool the buns completely before storing in an airtight container or resealable bag. Keep at room temperature for up to 2 days.
Freezing
Freeze fully cooled buns for up to 3 months for best quality. Slice before freezing if desired, then wrap each bun tightly and place in a freezer bag. Press out excess air before sealing.
Thaw at room temperature while still wrapped to help retain moisture. Once thawed, warm whole buns loosely wrapped in foil at 300°F for 8–10 minutes, or lightly toast the cut sides.
Nutrition Facts — Estimated
Servings per recipe: 6 · Serving size: 1 bun
Calories: 364
- Total fat: 15.2 g
- Saturated fat: 7.7 g
- Trans fat: 0.4 g
- Cholesterol: 138 mg
- Sodium: 482 mg
- Total carbohydrate: 46.6 g
- Dietary fiber: 6.1 g
- Total sugars: 8.3 g
- Added sugars: 5 g
- Protein: 13.9 g